
When a computer overheats, we are going to panic and rush to a repair shop. Before you do that, check a few quick software and airflow basics first.
Many heat spikes come from blocked vents, dust buildup, or a runaway app, and you can fix those fast. A simple maintenance routine also helps you avoid expensive computer repairs.
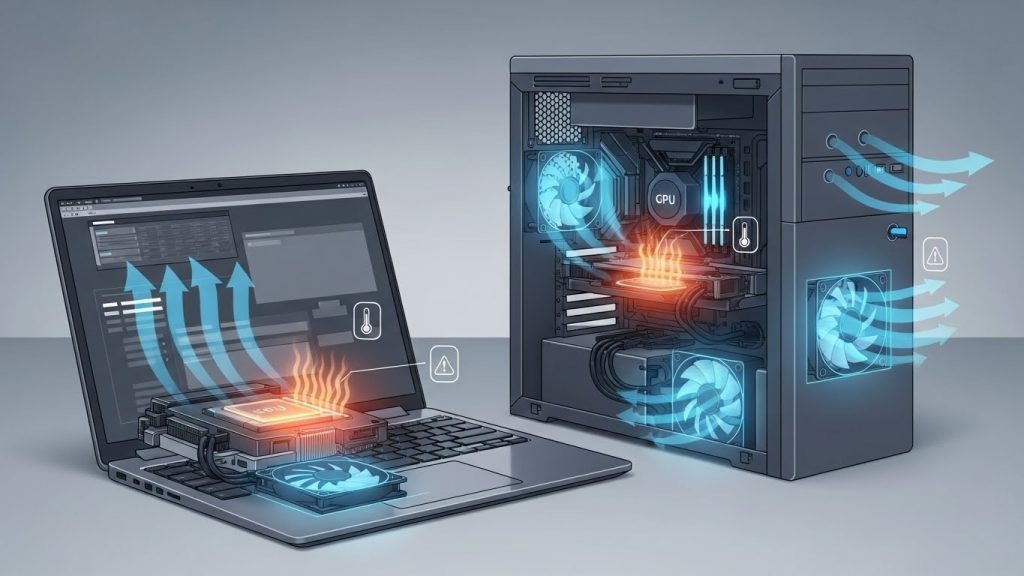
In this guide, you’ll learn how to spot overheating, stop the heat spike immediately, improve airflow, clean cooling parts safely, and adjust Windows to run cooler.
Signs Your Computer Is Overheating (And a Quick Temp Check)
Overheating usually shows up as loud fans, sudden slowdowns, stuttering video, or the laptop feeling hot near the keyboard and vents. On desktops, you may notice hot air blasting from the rear exhaust, random restarts, or apps crashing under load. If you see a “thermal” warning or shutdown message, take it seriously.
For a quick temperature check in Windows, open Task Manager and look for unusually high CPU usage at idle. Then use a trusted temperature tool (like a motherboard/CPU monitor) to confirm temps. As a rough rule, sustained CPU temps in the 90°C+ range under normal work can signal a cooling problem.
Fast Triage in 60 Seconds (Stop the Heat Spike Right Now)
Start by saving your work so a shutdown won’t cost you files. Next, close heavy apps like games, video editors, or dozens of browser tabs. Press Ctrl + Shift + Esc to open Task Manager, sort by CPU, and end any process that’s stuck at a high percentage. Then check the basics: move the device to a hard, flat surface, keep the vents clear, and unplug non-essential USB devices. If the laptop is scorching, shut it down for 2–3 minutes, then restart and test again.
Airflow Fixes That Work on Any Laptop or Desktop
Airflow is the fastest “no-tools” fix for overheating. On a laptop, don’t use it on a bed, couch, or blanket—soft surfaces block intake vents. Place it on a hard table, and lift the rear edge slightly with a stand or even a stable object to create space for air to move. Keep the vents facing open air, not a wall.
On a desktop, make sure the back exhaust has a few inches of clearance, and the case isn’t trapped inside a tight cabinet. Check that front/bottom intakes aren’t blocked by dust or carpet. Also avoid stacking papers or gear around the case. Better airflow lowers temperatures immediately and keeps fans quieter.
Clean the Cooling System Without Damaging Anything
Cleaning Laptop Vents Safely
Power down the laptop, unplug it, and let it cool. Use a soft brush to loosen dust around the vents, then use short bursts of compressed air angled outward so dust exits the vent.
Don’t push air straight into the fan for long, fast spinning can stress the bearings. Avoid vacuuming directly on vents because static can be risky. After cleaning, wait a minute, then boot up and listen for quieter fan noise.
Cleaning Desktop Fans/Filters Safely
Turn off the PC, switch off the PSU, and unplug it. Open the case and remove dust filters (front/bottom/top) and rinse or wipe them dry.
Hold fan blades in place with a finger or cotton swab, then blow dust out with compressed air in short bursts.
Clean the heatsink fins gently, and wipe surfaces with a microfiber cloth. Re-seat filters, close the case, and confirm fans spin normally on restart.
Windows Settings That Reduce Heat Without Killing Performance
Start with Power & battery settings. Go to Settings > System > Power & battery and set Power mode to Balanced (or Best power efficiency if you’re overheating during light work). This often lowers CPU boost behavior without making the PC feel slow. Next, reduce background load: open Task Manager > Startup apps and disable anything you don’t need launching at boot.
Also check Graphics settings: Settings > System > Display > Graphics and set heavy apps (games/editors) to the right GPU so the CPU isn’t doing extra work. Finally, keep Windows updated, chipset and power-management fixes arrive through updates that improve thermals over time.
Software Causes: Updates, Drivers, and Malware That Keep the CPU Hot
If airflow and dust aren’t the issue, software is often the culprit. First, open Task Manager and look for a process that keeps CPU usage high even when you’re doing nothing.
Browsers with too many extensions, cloud-sync apps, and failed update loops can all heat up a system. Check Windows Update and finish any pending updates, then restart. Half-installed updates can keep services working nonstop.
Next, update key drivers: chipset, graphics, and Wi-Fi drivers can affect power and fan behavior. Use your PC maker’s support tool or official driver pages, not random download sites.
Finally, run a full malware scan with Windows Security. Cryptominers and adware are common reasons a “normal” PC suddenly runs hot.
When Overheating Means “Repair Time”
Sometimes overheating isn’t a settings or dust problem, it’s failing hardware. If the fan makes grinding noises, doesn’t spin consistently, or ramps to 100% even at idle, the fan or its controller may be failing.
Another red flag is temperatures shooting up within minutes of startup, which can point to dried-out thermal paste or a heatsink that’s not seated properly. Batteries that swell, random shutdowns under light use, or burning smells also mean you should stop using the device.
If you’ve tried airflow fixes, cleaning, and software checks and the heat problem returns quickly, it’s time for a professional inspection to prevent permanent damage.